
Making a photo album personal on Facebook is another best way to make your Facebook private. A Facebook picture album includes a collection of your photo. You can make it noticeable only to you or those who you want to show your picture albums. In some cases, Facebook will automatically develop the albums for your pictures according to its type, time and date, etc.
Whereas, you can likewise create a picture album with your photos on Facebook So, do you frequently create the photo albums on Facebook? Or want you make your existing picture albums private on Facebook? Then, follow the below guidelines to make your image album personal on Facebook.
How To Make Facebook Photos Private
Computer system:
1. Log in to your Facebook account and go to your Facebook profile.

2. Select the "Photos" Tab, and after that select the "Albums" subcategory.
3. Click an album you wanted to make personal.

4. Click the "Edit" button at the top right corner of the album.

5. On the next page, Click the "Audience Selector Tool" simply under the personal privacy.
6. Lastly, choose the "Only Me" choice if you prefer to make visible your photo album only to you, or select the desired audience to make it visible to a picked group of people.
Mobile:
1. Go to your Facebook profile page on the Facebook app.

2. Select "Photos" tab.
3. On the next screen, swipe left and navigate to "Albums" area.
4. Select an album you choose to make personal.

5. Then, tap the three-dot icon on top right corner of the album and tap the "Edit" button.
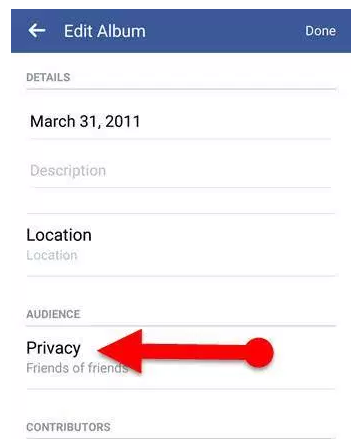
6. On the "Edit Album" section, tap on the "Personal privacy" alternative.

7. Finally, select the wanted audience. (Again, To make your album visible only to you, pick the "Only Me" choice.).
Tips:.
If you want to make your cover pictures personal on Facebook, then pick the "Cover Photos" album on the "Album" area and make your "Cover pictures" private by following the above steps.
And one more thing please don’t forget to share this awesome trick to use the How To Make Facebook Photos Private with your friends.