Make A Facebook Cover Photo
Don't anguish if you're not a master of Photoshop. Facebook makes it easy to include pictures of a sufficient size and many tools out there have inspiring design templates and can help you perfect your cover image. Lastly, this article will show you how it is done one step at a time.
The Anatomy Of The Facebook Cover Image
To produce the best Facebook cover photo, you have to get its measurements right. Examining the aspects on a Facebook page exposes that the cover picture measures 851 pixels in width and 315 pixels in height.

When you select an image, note that the bottom left corner will be covered by your profile photo.
- The profile photo steps 170 × 170 pixels consisting of the border,
- It is spaced 15 pixels from the left edge of the cover picture,
- and it extends ~ 26 pixels beyond its bottom edge.
In addition, the bottom edge will offer space to your name beside your profile picture and 2 buttons to the right.
The best ways to Create The Perfect Cover Picture
Whatever type of cover image you go with, make sure the quality is right. Pick a sharp image that is at least 851 × 315 pixels big. The cover photo size is odd. Fortunately, the image you choose can be larger. Facebook will not distort it, rather you will have the ability to place an over-sized photo and choose the frame that will be shown as your cover picture. For an amazing result, nevertheless, you may want to invest some additional effort.
Believe beyond a stunning image! Exactly what else can you do with that space? Can you playfully integrate the overlapping profile picture into your cover picture? If you can not believe of anything, be inspired by what others have done ...

such as Antonio Fadda ...

Kay Int Veen ...

or Jérôme Vadon.
Looks tough to produce, doesn't it? Well, achieving the impacts you see above is not that hard. Create your cover photo as if your profile image belonged of it. You can utilize a complimentary image editor such as Paint.NET. Keep in mind the measurements I shared above to obtain the positioning of your profile picture just right. Then essentially crop the profile picture from the ended up cover photo. The white frame is added by Facebook. Lastly, include both pictures to Facebook individually and delight in a genuinely creative outcome.
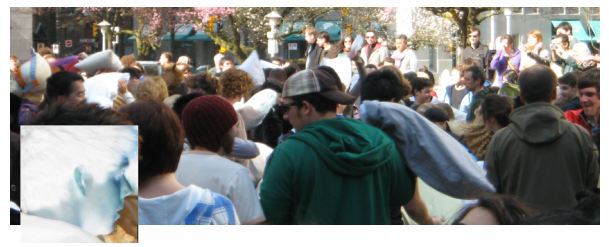
The example above was produced with IrfanView from a random pillow fight crowd image. The unfavorable shows the position where the profile picture will overlay the cover picture. The profile image would be cropped from the cover photo, ideally in a size of 180 × 180 pixels, although in the end it will just measure 160 × 160 pixels plus a 5 pixels border. Select a somewhat cooler crowd photo that includes you, process the resulting cover and profile image with filters or impacts for perfection, and your Timeline will resemble no other.
If that still sounds too complex, try among the many Facebook cover photo tools. They can assist you crop your favorite photo to the perfect size, add filters, combine a number of pictures into a collage, or add your pictures to an enjoyable design template. With those helpers, it becomes easy to develop a custom-made and fantastic Facebook cover photo.
Here is a simple one. Autre Planète's Social network Image Maker is a great tool to enhance a single image. It supports both Facebook profile and cover images. After cropping your photo, you can include Instagram-style filters, add additional results to the photo, change its name, pick the output file format, and finally download the file. The tool works independent of your Facebook account, which is a plus in my book.

The best ways to Add a Cover Picture.
As soon as you have an appropriate cover photo, go to your Facebook Timeline. Merely click your very own name anywhere on Facebook. If you do not have a cover image at the minute, click Add a Cover in the leading right.

This will trigger a pop-up window that describes a bit more about Cover pictures. Generally, Facebook wants you to use an unique and individual photo.

When you Okay the message, you can finally access the Include a Cover drop-down menu.

Your standard options are:.
- Pick from Pictures ... you have previously uploaded to Facebook.
- Add Synced Photo ... from your mobile phone.
- Upload Photo ... from your computer.
If you have formerly added a cover picture, hover with your mouse over the image and click the Change Cover button that will appear. Here you will see two additional alternatives, particularly Reposition and Eliminate.

Facebook will instantly change the photo to the maximum width. If it's taller than the offered space, you can drag it into place up until you are delighted with the outcome.

Before you opt to Conserve Modifications, keep in mind that your cover image will instantly be noticeable to the general public, no matter previous privacy settings! If you would like to try another picture, click Cancel in the bottom right.

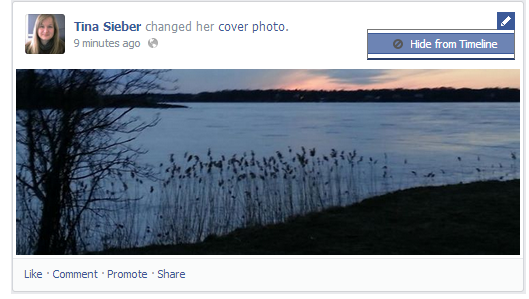
As soon as you hit the Save Changes button, Facebook will update your Timeline and reveal to the public that you have changed your cover image. This message is public by default and will appear on your buddies' News Feeds, no matter other personal privacy settings. However, you can hide it from your Timeline when you click the Edit or Eliminate button in the top right of the status upgrade.
Conclusion.
Creating a creative Facebook cover picture can be a lot of enjoyable. However even a simple and stunning image can boost your Timeline. What counts is that you give your cover picture your own style; that's exactly what makes your Timeline special.
How have you crafted your cover image and do you dare to share the outcome with us? If that's all we can tell about Make A Facebook Cover Photo I hope this article was helpful thank you.